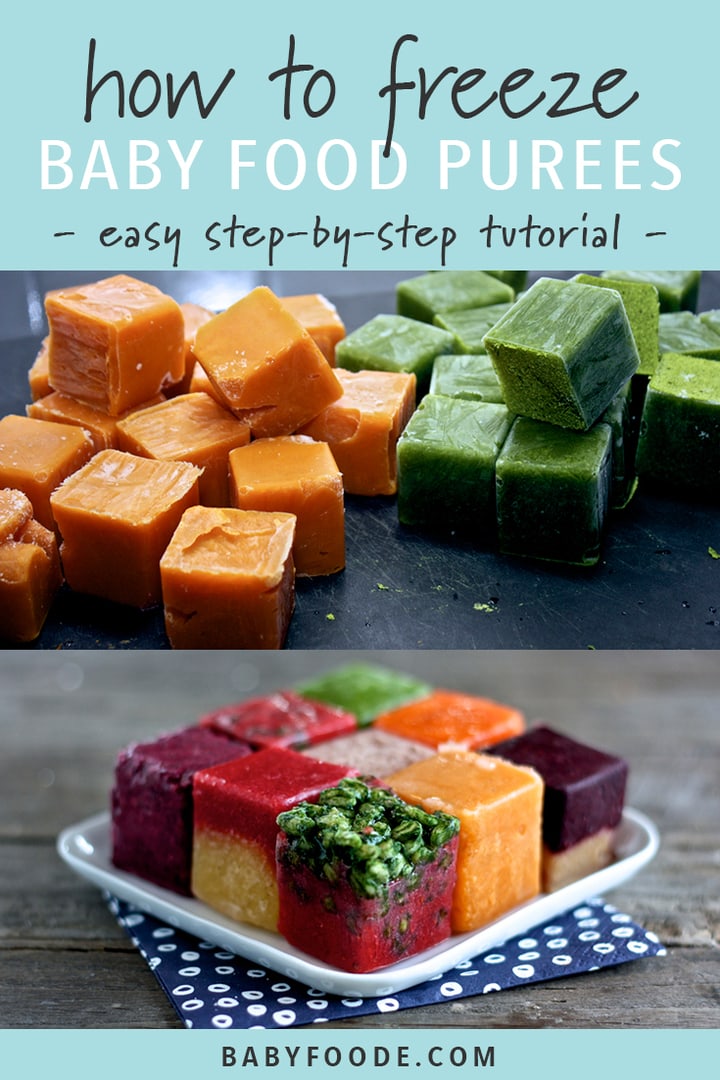
How To: Freeze Baby Purees
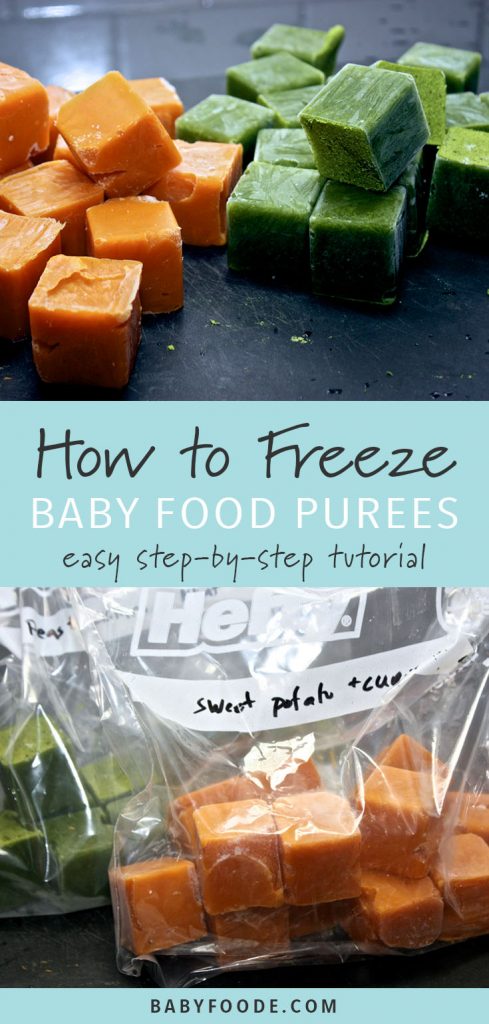
Learn everything you need to know about storing and freezing homemade baby food recipes! You need just a few simple supplies to properly freeze and store baby food. This post walks you through every thing you need to know. You’ll be a pro in no time!
I find that for a lot of moms there are several things that makes them afraid of making their own baby food – they think it is a time consuming process, they don’t know where to start or what recipes are the best for their babies.
Don’t worry. Stop stressing. Get cooking.
If I can do it, I know you can do it [I am really not that smart].
Making your own baby food is super EASY – it just takes a little planning and a small chunk of time.
Here is the prep work
First, you want to start with finding a couple of recipes that are age appropriate, have ingredients in season and have different tastes (savory, sweet, different colors, mix of fruits and veggies). The fresher the produce the better the food will taste and the cheaper it will be to make. Now, if you find yourself making baby food in the dead of winter, don’t give up. Use frozen organic produce. It’s that easy. It will have a similar taste since most frozen food is flash frozen at the peak of ripeness.
Secondly, you need to decide how much you are going to make. 2 weeks worth? A month worth? Depending on how long you want your food to last you might want to double or triple some recipes. You can easily make 2 weeks worth of food in 2-3 hours. The key is make recipes that require different methods of cooking. You can be roasting one recipe at the same time as steaming another recipe while you have another recipe simmering away. Another great idea, is to call another mama and do it together. More fun, more food.
Thirdly, go shopping. Get a big coffee, leave the babes with hubby and take your time. If you are being thrifty, you might have to go to a couple different stores to get the best deals. Costco is constantly adding more and more organic produce options and because you get so much produce it is a great option for making big batches of baby food. Local organic shops, food co-ops, farmers markets are all awesome ways to get cheaper organic produce. Where ever you shop, make sure to get the best looking produce you can find.
Now, it’s time to get down to business.
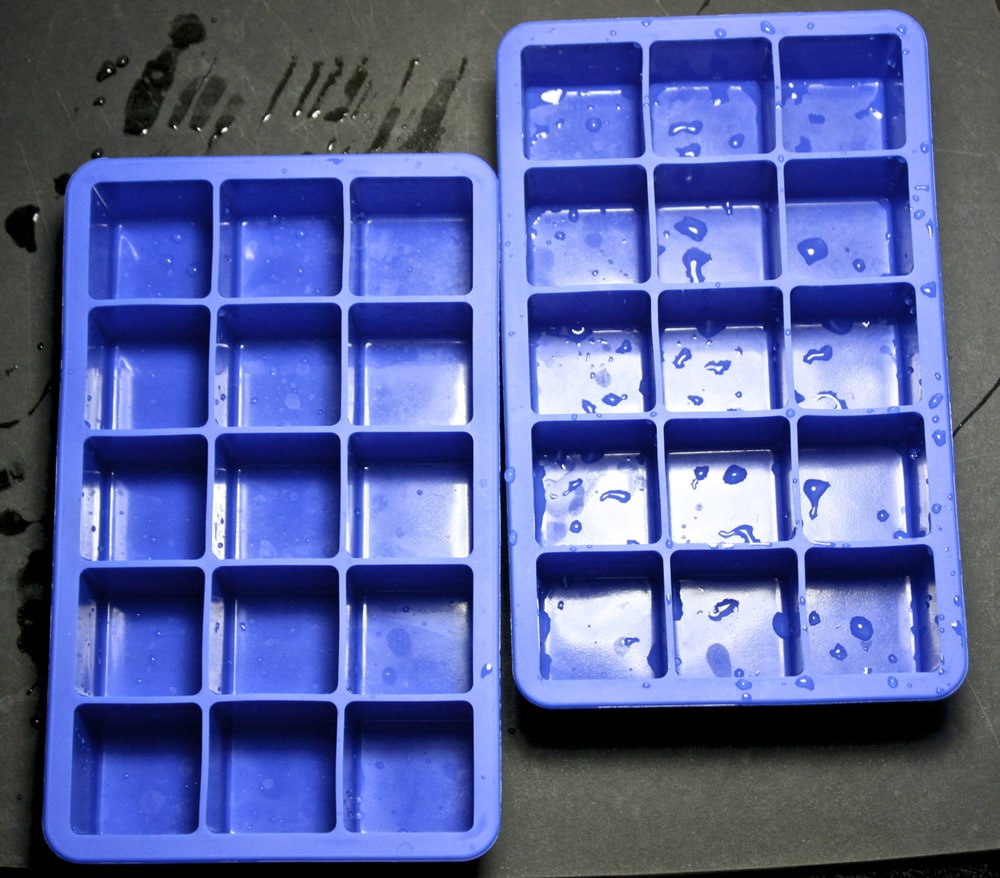
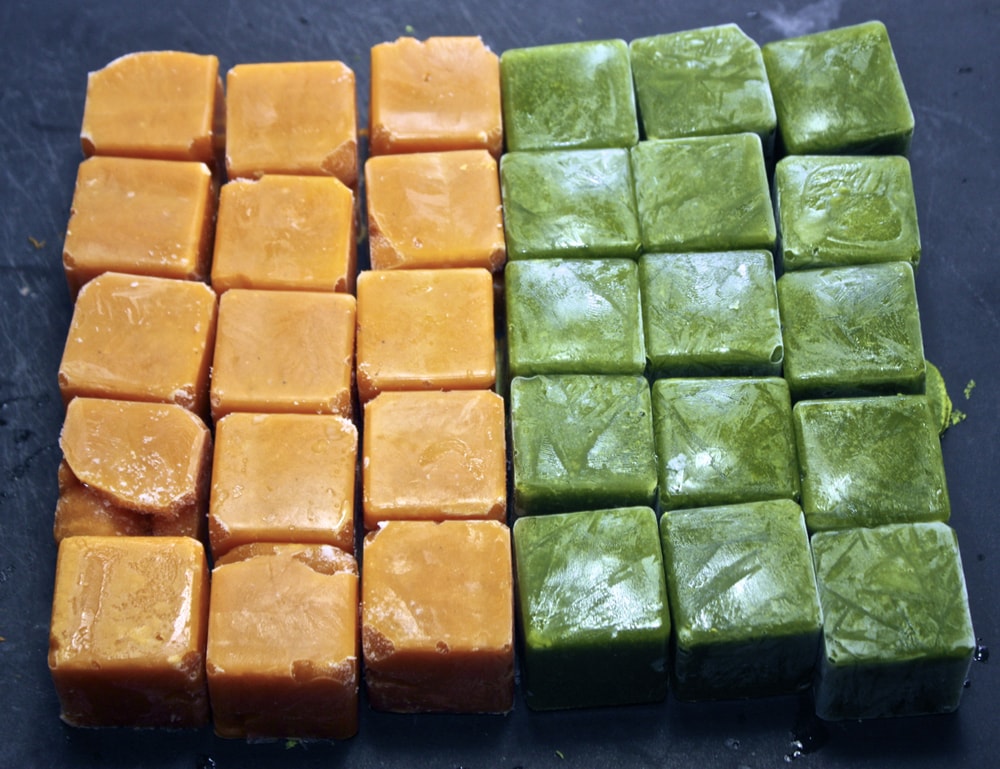
Step 1- Get yourself some ice cube trays. I use these ones because I like the look of how the frozen purees turn out, but any ice cube trays that are BPA and phthalate free will work. These ones are way too cool. I would recommend having at least 10 or more trays so you can freeze a bunch at a time. Don’t worry you will easily find adult ways to use them – like this, this and this.
Step 2- Wash the trays, and I mean really wash them. Hand wash or put them through the dishwasher (if recommend by vendor).
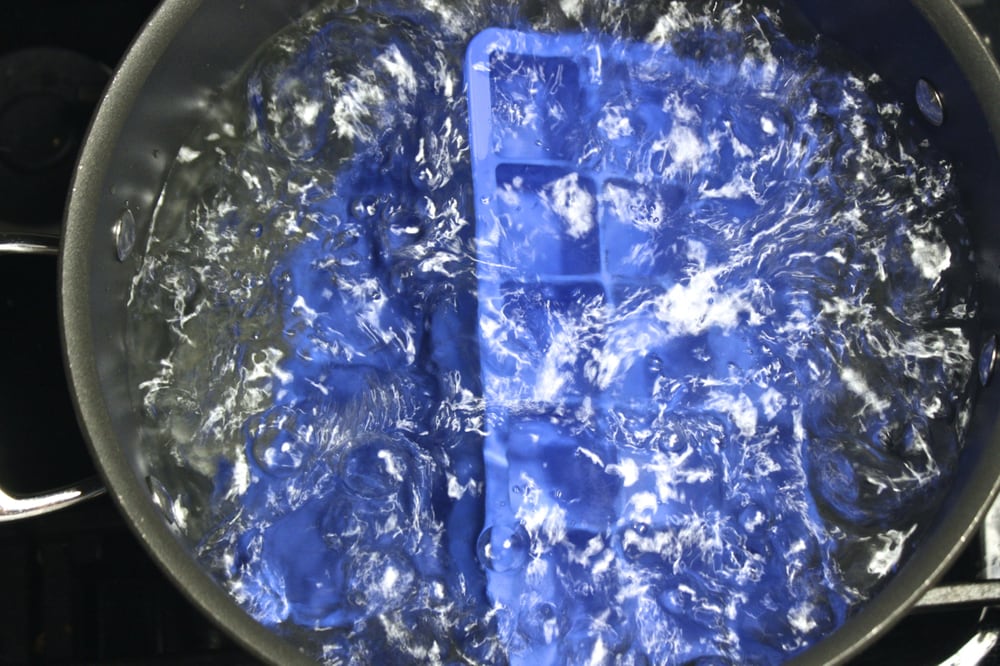
Step 3- Give the trays a bath for 3 minutes in boiling water. I know what your thinking, I just washed the trays do I really need to give them another bath? Yes. Or I should say, I would highly recommend it until your baby is at least 1 year old. This will kill off any bacteria that might still be on your trays. When your baby is young, they are more susceptible to bacteria. So kill those nasty bacteria off by boiling your trays. I do this step while I am wiping down my counters and getting all of my produce ready.
Step 4- Make your baby food. The fun part!! Let cool slightly in a bowl or ziplock baggie. You never want to let cooked baby food stand out at room temperature for longer then an hour so if you need more time, simply put the puree into the fridge until you have a minute to freeze it.
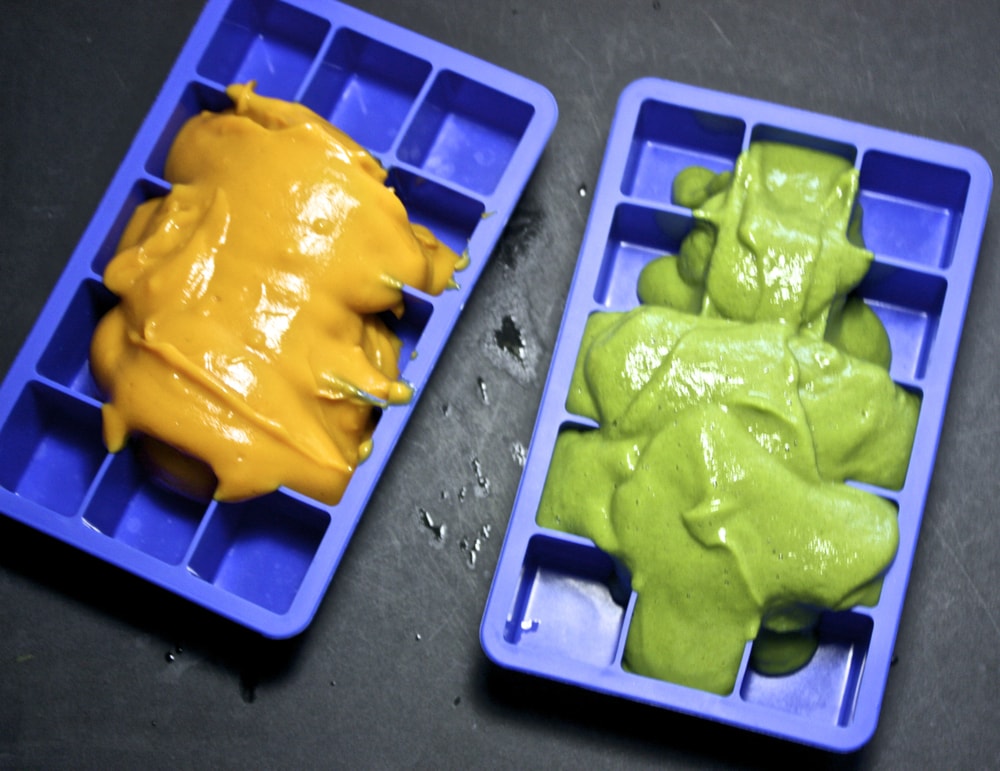
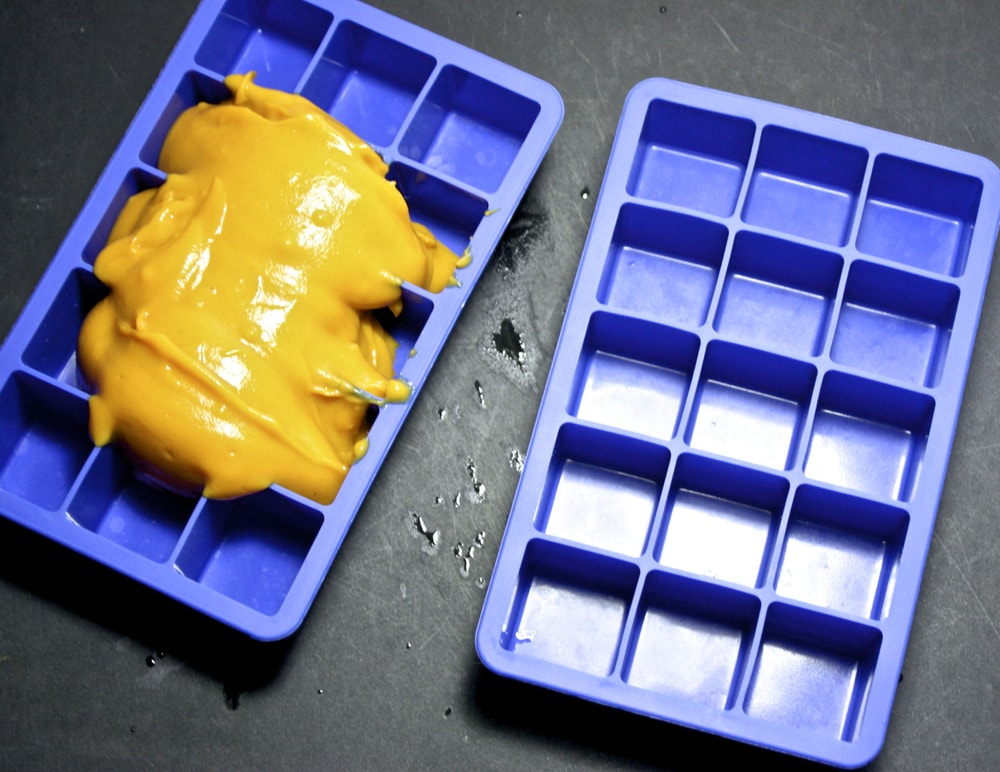
Step 5- Pour purees into ice cube trays. If using bowls, simply scoop out puree and dump into trays. If using baggies, cut off one of the tips of the baggie big enough for the puree to come out but not pour everywhere. Twist baggie above the puree and squeeze the puree into tray.
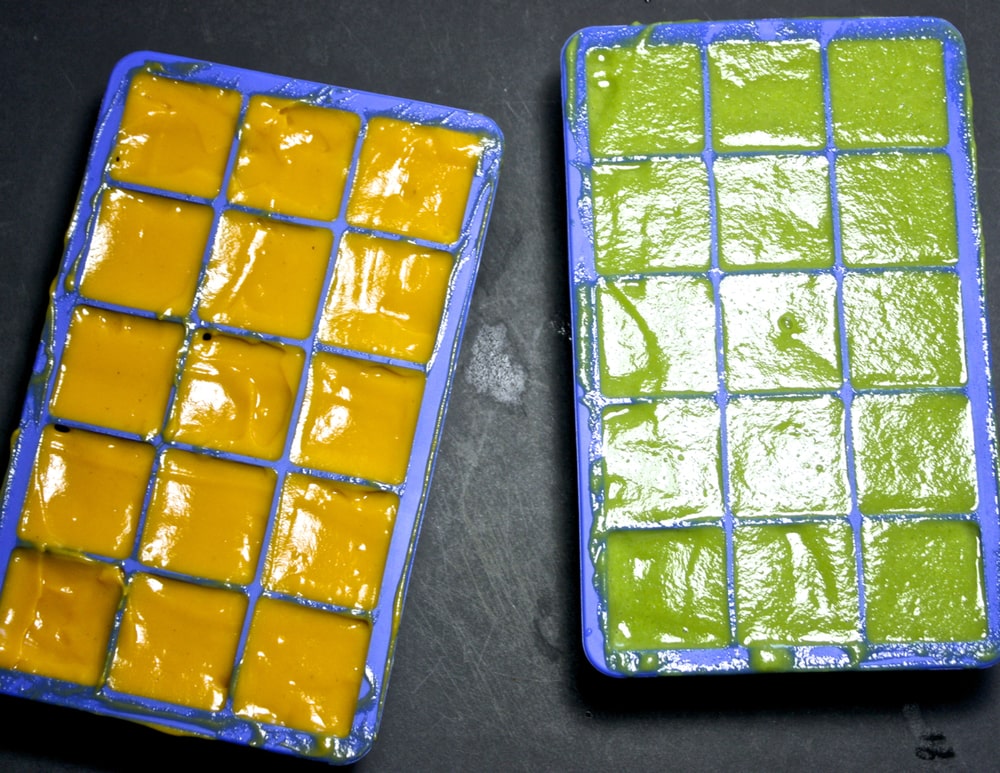
Step 6- Spread out puree into molds. Pat down puree with back of spoon or spatula so you don’t get any air bubbles. Scrap excess puree back into bowl or bag.
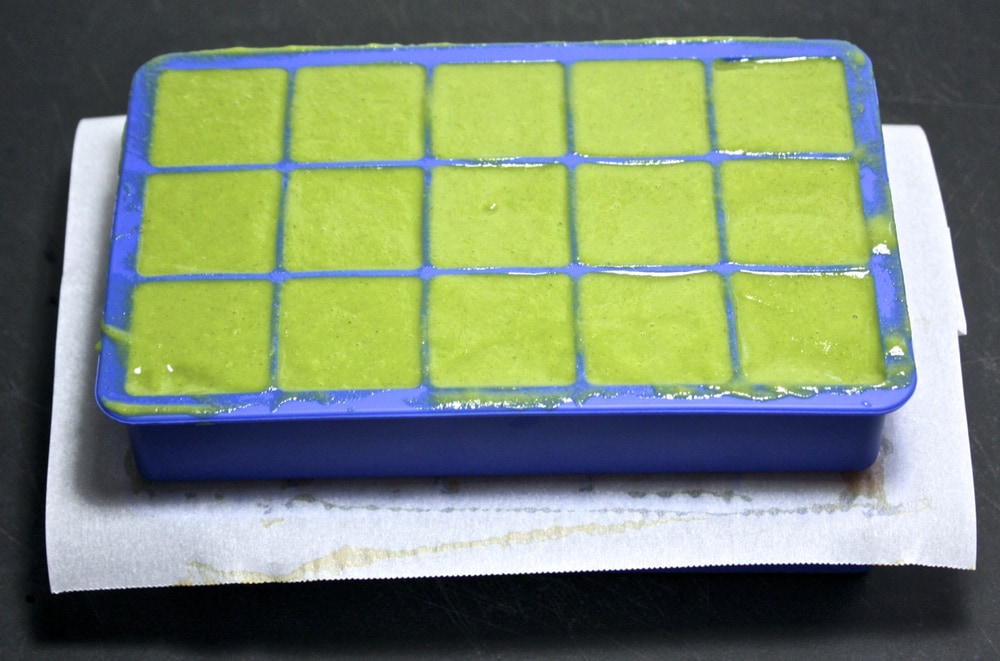
Step 7- Stack ice cube trays in freezer with parchment paper in-between trays to keep them from sticking to each other.
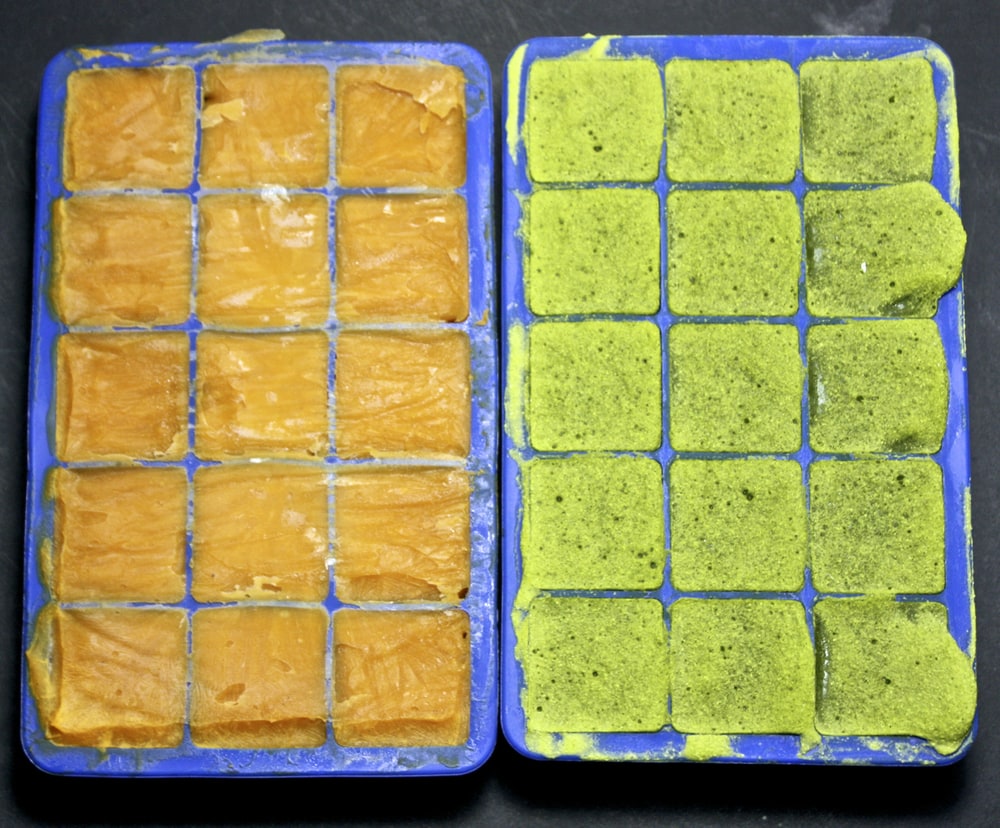
Step 8- Let freeze for 24 hours.
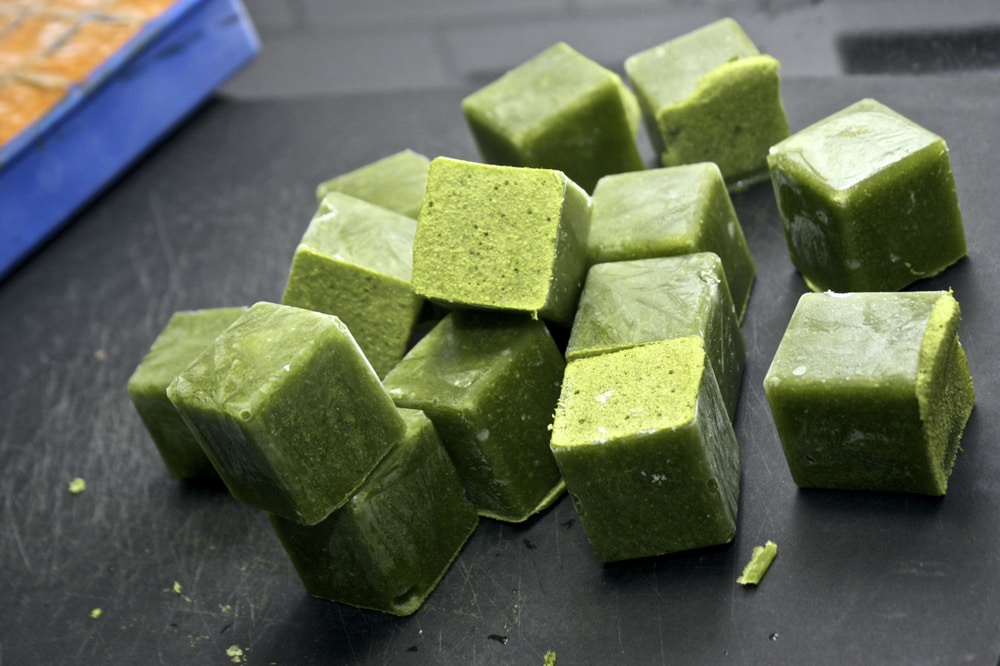
Step 9- Bust cubes out of trays. You might want to wear kitchen gloves during this part as the trays are cold. Obviously.
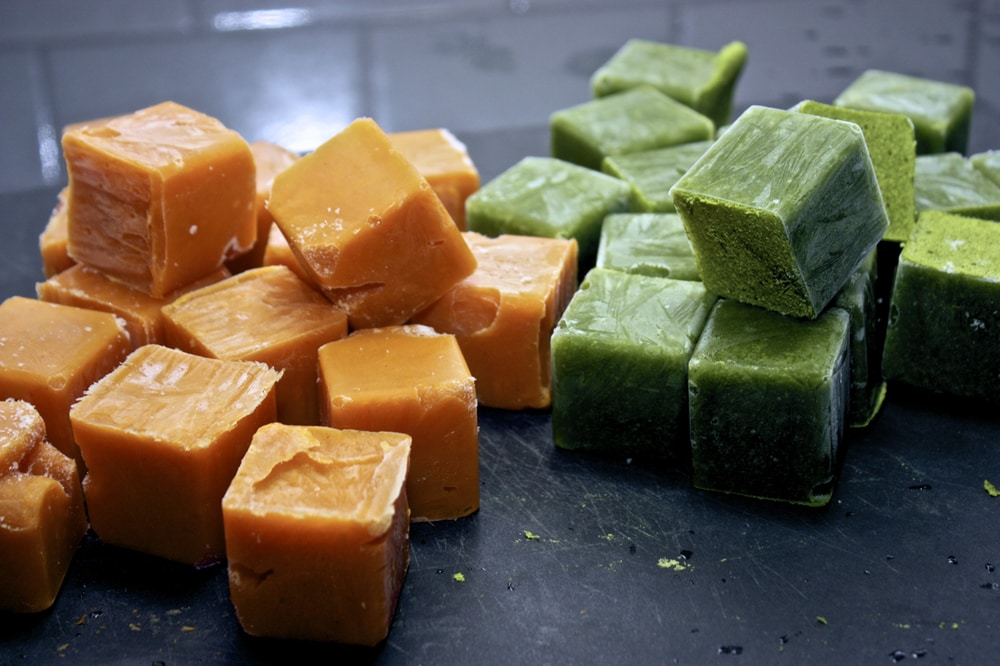
Step 10- Feel good about yourself. Dance up and down, do a couple fist pumps or pat your own back. Look at what you just made your baby!
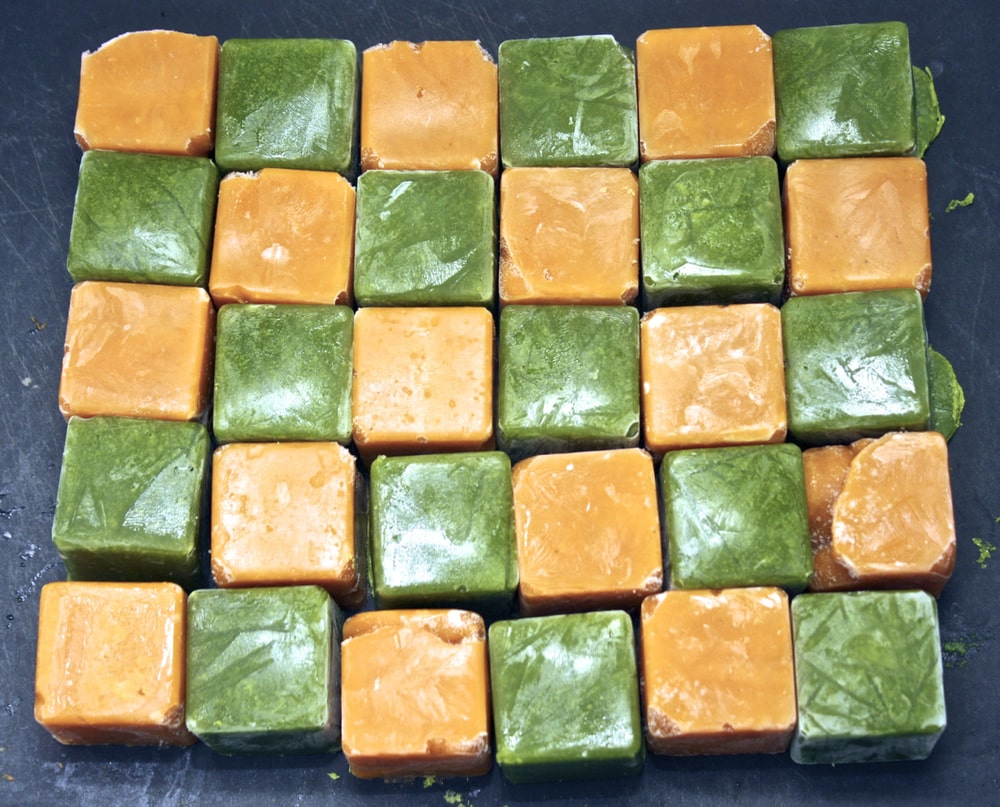
Playing around is always fun.
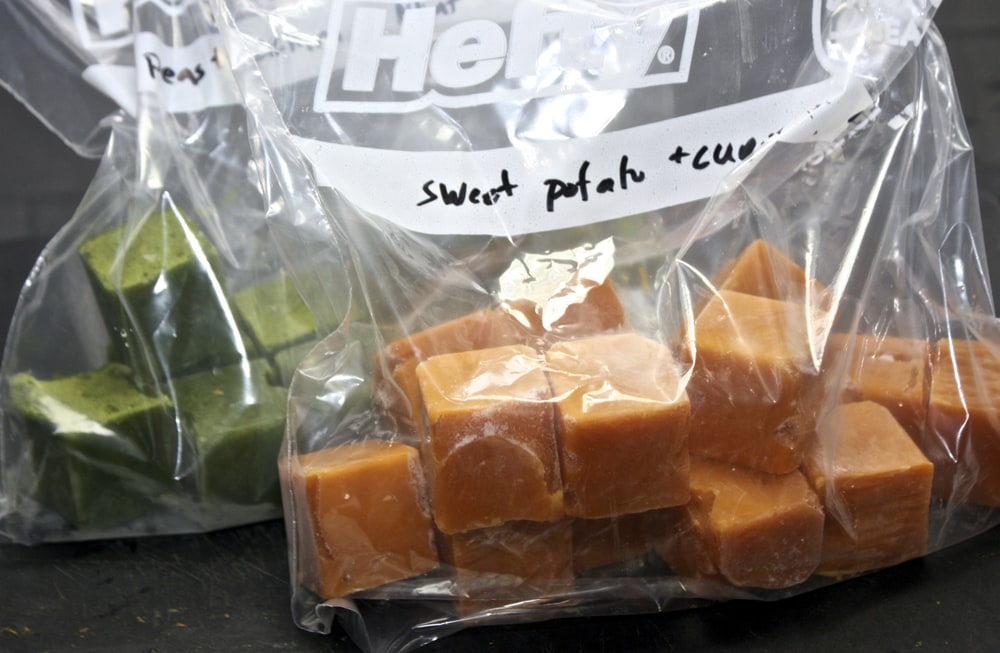
Step 11- Store in freezer bags or air-tight containers and LABEL (I almost always forget this part, which makes it tough to know what your feeding your babe when you forget what is in each bag. I won’t forget, I won’t forget) with ingredients and date you made it. All cubes will last between 3-4 months but this date really depends on your freezer. So be realistic. Is your freezer stuffed with a ton of other food that has been there for longer then your remember, which in turn makes it hard to close your freezer door? Then your baby puree might only last 1-2 months. Is your freezer so nice and neat that you actually have room for all of these baby puree ice cube trays? Then your baby purees will probably last longer. The best bet would be to have space dedicated to your baby food in a deep freeze. A luxury I know.
Heating up your AMAZING baby food
There are several ways you can defrost frozen baby food:
– Place frozen cubes into a container in your fridge and let defrost overnight.
– Take frozen cubes and put in microwave safe bowl and heat in microwave for 30 seconds per cube. Stir and test to make sure the food is the right temperature.
– Heat frozen cubes in small sauce pan for 3-5 minutes or until melted. Let cool slightly and then serve warm.

23 Comments on “How To: Freeze Baby Purees”
I just found your blog via Pinterest + I love it! So many great posts. This one in particular is so informative, since I’m a newbie when it comes to making baby food. Super helpful + easy to follow. And the pictures? WOW! Thank you so much for sharing this!
Thanks for the kind words!! Let me know how your baby food making goes. My advice is to have fun with it!..and have a backup glass of wine for when the spit out all of your hard work. It will happen 🙂
xo,
Michele
I really appreciate your blog! It’s very informative and full of great recipes. I’m excited to try them. I am just prepping for my first’s solid attempt and feel so good about making it myself. I just want to add a tip. Cuisinart makes a blender wand that is AMAzing! I think it should be added to your best blenders. I just made pears tonight and it’s super easy and the cleanup is almost non existent. I feel like you also need to start a blog on how to eat for the postpartum mommy trying to get back to a healthy normal. I am a L & D RN and am inspired by the nutritionist side of things… Thinking of joining the club. What a cool way to inspire. Thanks for sharing your wisdom.
Heather,
So glad you found us and I can’t wait to hear all about your first baby food making experience!!
Thanks for the tip! I have never thought of using a blender wand for making baby food (can you tell I am having a love affair with my vitamix) but I am back in the kitchen tomorrow making and taking pictures of some new and very fun purees so I will have to give my wand a try.
Funny, just a couple of weeks ago I was thinking of adding a section of tips, meals and advise for pre and post natal women! Of course, I am still working (yes 20 months later!!) on losing my baby weight :/ so I might have to seek out some expert advise in this category. If you have any recipes, please send them along I would love to try them:)
xo, Michele
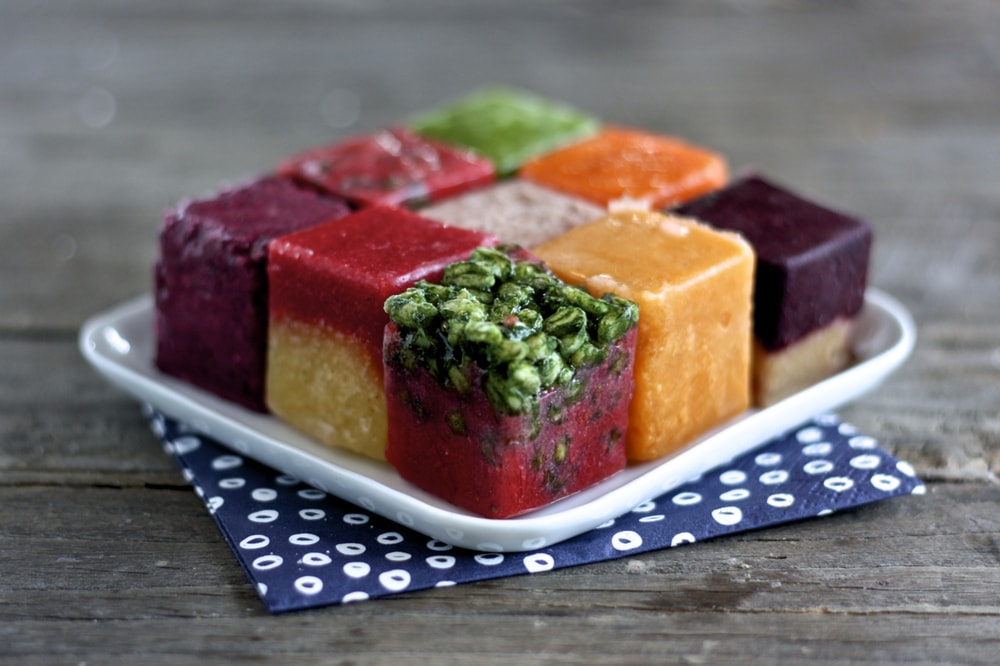
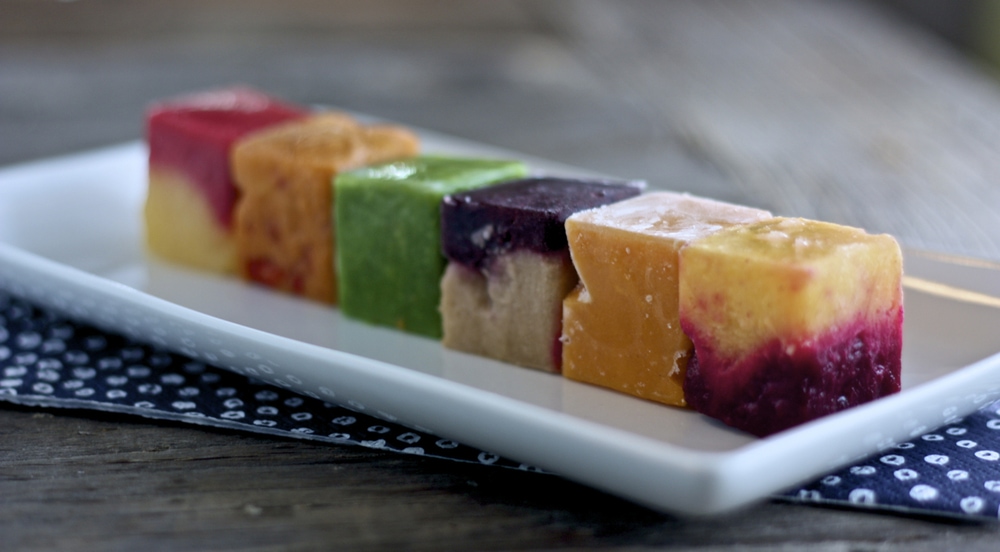
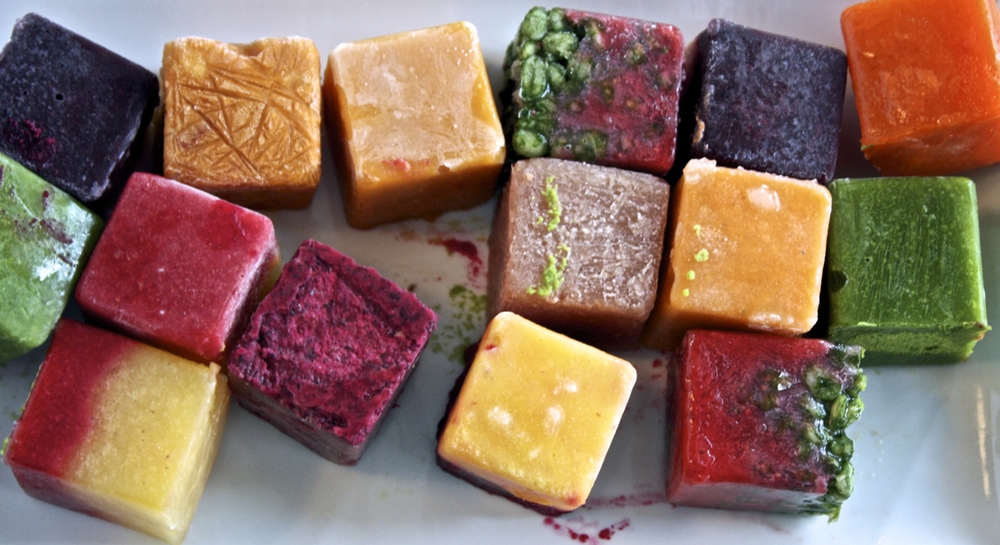
Every time I look at these pictures, I always wonder what the red and green one is. It just looks so cool! Do tell what it is! 🙂
Hello Katie,
It is the Strawberry Fields puree…YUM!!
http://www.babyfoode.com/blog/2013/9/12/strawberry-fields-strawberry-spinach-chives-barley
GREAT SITE!! The Link for your ice cube trays doesn’t work. Where can I find those? 🙂
Thanks Jen!
Sorry about that… I got them from amazon but you can also find them at http://www.tovolo.com.
xoxo,
Michele
Hi Michele,
What is the volume of each cube of your ice cube tray? And you’re right, they do come out looking beautiful!
Erin
Hello Erin,
These trays make 1 ounce servings, but tovolo makes different size ice cube trays.
Michele
Hi Michele!
Thank you for providing this absolutely wonderful website. My son hasn’t started on solids yet but when he does I am excited to try many, MANY of your recipes. My son is about 5 1/2 months so I’m going to try and start solids in the next few weeks. In preparation, I want to order a few of the Tovolo trays you recommend. How many of them do you have on hand? Thanks much! ~Lindsey
Hello Lindsey,
So exciting!!! Let me know how it goes with his first purees!!
I would get at least 4-6 trays and see how that goes. Depending on how much puree you have, you can always keep some of the puree in the fridge (in an air-tight container or zip-lock baggie) for a day or two while the trays are being used for the first batch and then you can do a second batch.
xoxo, Michele
I have just found your site i wish i found it earlier when i had my other 2 children, you explain every thing very well and clearly. I tried to lick on the link to purchase the Trays but its not connecting would love to know where i can buy them from, i have been printing away your charts this morning THANK YOU really helpful
So glad you are here! I fixed the link but they are from tovolo! I love them for making baby food and ice for my summer cocktails!:)
enjoy!
xo, Michele
I love this site with all my heart. I’ve always wondered what flavor was the multi-colored purée was? The one with the yellow and magenta colors? My son JUST turned 6 months. I’m so excited to start him out with foods
So glad!! Thank you!
I believe it is strawberry with mango and cloves, but I can’t say for sure, my memory after 2 kids isn’t as good as it used to be:)
xo, Michele
I am SO happy that I stumbled upon your blog on Pinterest today! I’ve just started to think about what I’ll be feeding my little one next (he’s 4 months). In my mind, I’ve always wanted to make baby food for him, but was afraid it would be too time consuming. You make it seem so easy! I am excited to start letting him try new foods!! Will definitely be purchasing some ice cube trays soon 🙂 Thank you for all the advice (your photos are so inspiring too)!!
thank you! so glad you found me!!! Let me know how it goes!
xo, Michele
Thank you for posting such interesting and easy to follow recipes! This site has been wonderful for our new little one. Quick question…..how long are solids good for in the fridge after defrosting them? Thanks in advance for the response!
Hello Jen,
So glad you found us!!! Thanks for reading:)
If you defrost the purees using the microwave or stovetop method, I would recommend using it that day. If defrosting in the fridge overnight, you can keep the purees for 2-3 days.
Hope that helps,
xo, Michele
Absolutely love your blog! I recently created a slack community for parents and experts who are passionate about baby nutrition. We would love your advice and input in our community! http://hashtagbabyfood.com/ is our website, we can’t wait for you to join!
1st off your site is amazing and saving my baby good life! Two questions
#1: I have made your green beans, broccoli & butter nut squash. When I freeze then they have a good consistency but when I thaw them their seems to be extra water ( green beans were the worst the other two it wasn’t bad) did I mess up?
#2: I noticed the extra water in thawed broccoli had some bubbles? Again did I mess up? All food has been thawed in fridge overnight.
So glad you are here! Yes, when you freeze and thaw the purees there can be some extra water in it. That is totally normal and perfectly fine. Usually, when you stir the puree the water will get reincorporated and should go back to the original consistency. If it’s too runny, you can always add in a little cereal, oats or yogurt to help thicken it up. Also, if the bubbles were small, that is also normal. Let me know if you have any more questions.